Induction level 3
In this induction project the objective is to complete a self portrait


Self portrait
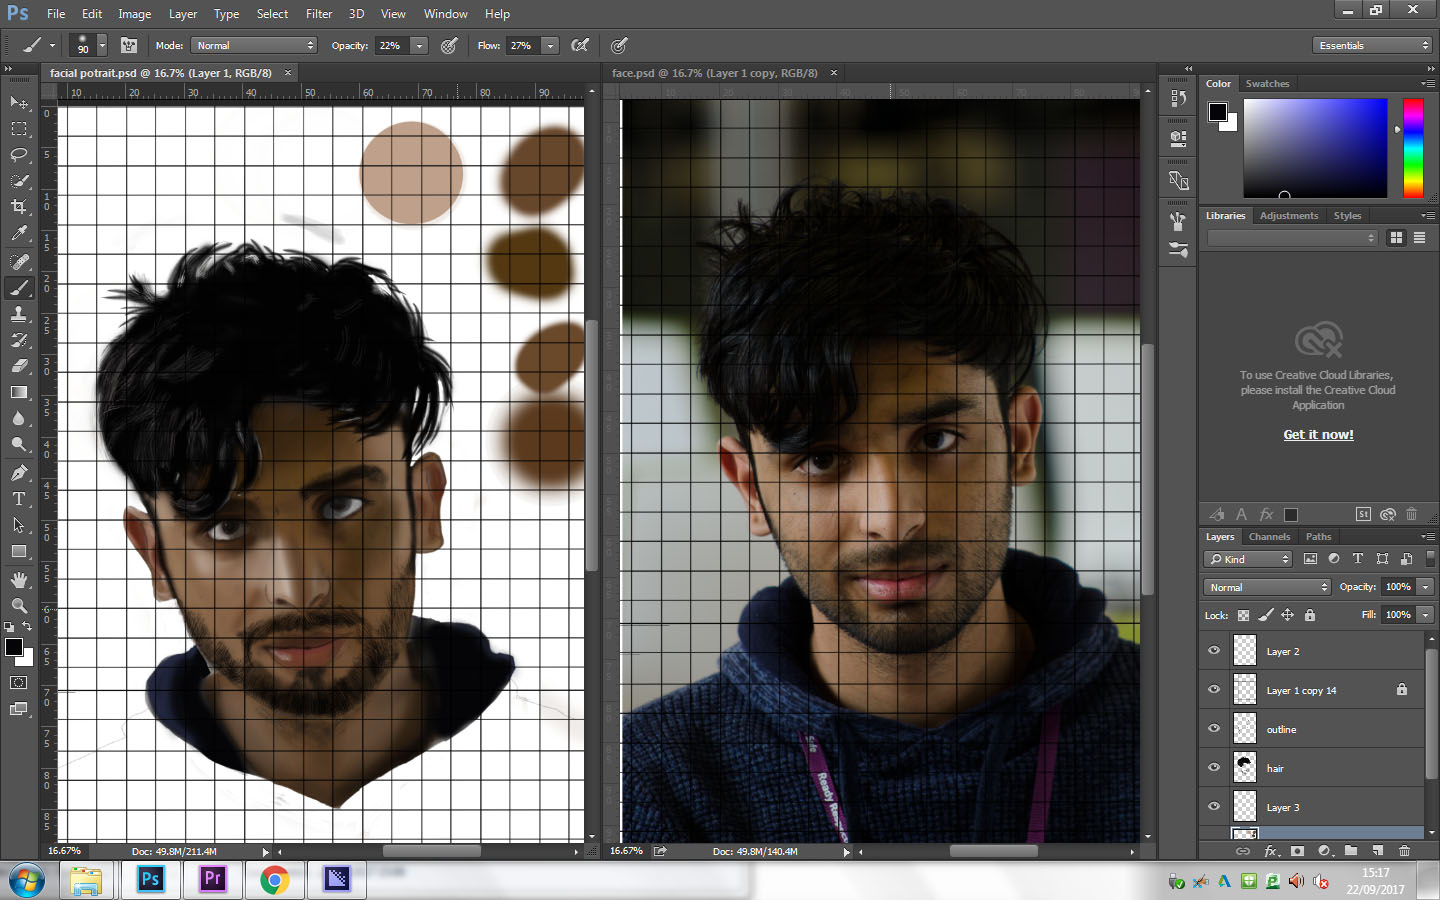
today I started my self portrait using Photoshop first i started with the outline so have bases when come to doing the colour. also used the grid to make easy to draw the shapes and features. once I had my outline i could start my colour starting form dark and going to light

For this one I added more dark tones and light patches on my face , I also blended the dark and light colours on the right side and i also removed the brown colour from the eye so i can added the white on the eye ball for later.

Self Portrait
I have finish the level 3 induction project of a self portrait in which I drew then painted my face in digital paint in Photoshop which was the most suitable software when coming to doing digital painting or drawing. Using the grid method I used the grid so I can accuracy draw about my face any feature once I had the shape of my face and location feature such as the eye's , nose and mouth I could start painting.I used the technique of going from dark to light first by colour in my face with dark part minus the hair.I could then from dark to light by using the light colour on the parts of my face that appeared light.I also need the look of depth so I used the technique of dark the area not too much so it appears as a shadow but as but more as darken shade of colour. but my most used technique was the blending because there were many different shade of colour and they need to be smoother out so my face doesn't look ruff.For my hair I colour it all black and then created a custom brush so could add highlights for my hair.All the colour I used I put right hand as a colour pallet all these technique are key to painting in Photoshop if you are painting in 3D making them all effective in creating depth dark tones and lighting.

this is first face portrait I did , I went through it step by step
firsts by drawing circle then have a line come down from the top middle of the circle and go out to how long I wanted my face to be then have a small line below where the middle line ends to represent the chin.then have to line come down from each side to where you going to have your mouth then connect the line to the chin, this will be the his jaw.after that from where your started the jaw line draw a line through the circle, so I have keep the eye I drawn level with each other.for my eyes I did round sockets for both side then I added my eyes and I used the top of the sockets as the eye brows.with my nose it position is at the bottom of the circle i first draw a small circle to represent the front of the nose then small little curve coming out from the circular, theses will the noses nostril.once I had my eye's and nose I could used them to do the measurements for my ears, by lining the top of the ears with the top the eye socket towards the nose.after that i add my mouth which is located between where the jaw line would curve into the chin.

these are a few I did but they have has a different feature
these where done to practise the proportions


These facial portraits is used when a face is angled.
angled portraits are then by first drawing a circle then draw a semi circle inside the circle, depending on angled the head determent how big the semi circle will be.then with in the semi circle I drew out a line which i used to show where the middle of the face will be and also so i know where i need to place the eyes also depending on how angled it will determent the angle of the head.The portrait needed a jaw so from the bottom of semi circle I drew line going across the face from that point I drew a line down to show right side of the jaw from that i added the chin. for the other side of the jaw i started from chin and i drew a line up to line at the bottom of the semi circle with I then carried on the line to the centre of the semi circle.I also need the bottom left of the jaw for that i started from the chin a drew angled line towards the bottom back of head portraits I then connect it to the circle to represents the end of the jaw.

after the angled portraits we had to draw random face that would appear on the screen for two minutes each face had difference feature and where angled differently

after the angled portraits we had to draw random face that would appear on the screen for two minutes each face had difference feature and where angled differently

for this we choice head portraits we practice a choice which one was out favourite and used that to create a character for a game.I choice my second one and for the body I made large because I wanted him to have big muscular body which i believe would go well with beard face.I also included bionic arm because my character is going to battle harden solider and the bionic arms is to show wounds from war.

For the final part we each got into pairs and each one of us would take 30 minute to draw the other person using proportions and add any feature they may have such as facile hair or glasses

skin tones
In today'd lesson we learnt about the tone of skins and we create face with a white European skin tone on Photoshop. we follow the example of an artist called sinix and what he did was first cover his face with three different skin colour on the top , middle and bottom of his face. for my face I added a small amount of yellow on the top of the head and the check has a dark pink on them.On Photoshop I used a number 11 brush and I stayed within the colour range of red and yellow. the colour also needed to be blended to make them look more smooth, there are also dark part these are the dept that come from the eyes or the light being block by either the nose or one side of the face.

This skin tone is with a dark African skin for this instead of having three main colour going along and blending them we started from a dark tone and began to lighten it.


Self portrait
today I started my self portrait using Photoshop first i started with the outline so have bases when come to doing the colour. also used the grid to make easy to draw the shapes and features. once I had my outline i could start my colour starting form dark and going to light

For this one I added more dark tones and light patches on my face , I also blended the dark and light colours on the right side and i also removed the brown colour from the eye so i can added the white on the eye ball for later.

Self Portrait
I have finish the level 3 induction project of a self portrait in which I drew then painted my face in digital paint in Photoshop which was the most suitable software when coming to doing digital painting or drawing. Using the grid method I used the grid so I can accuracy draw about my face any feature once I had the shape of my face and location feature such as the eye's , nose and mouth I could start painting.I used the technique of going from dark to light first by colour in my face with dark part minus the hair.I could then from dark to light by using the light colour on the parts of my face that appeared light.I also need the look of depth so I used the technique of dark the area not too much so it appears as a shadow but as but more as darken shade of colour. but my most used technique was the blending because there were many different shade of colour and they need to be smoother out so my face doesn't look ruff.For my hair I colour it all black and then created a custom brush so could add highlights for my hair.All the colour I used I put right hand as a colour pallet all these technique are key to painting in Photoshop if you are painting in 3D making them all effective in creating depth dark tones and lighting.

Comments
Post a Comment