Pre-Production concept Art Project 1
concept art presentation
we were task to create a power point presentation about concept, what it is? what it requires and how it influence movie and games.also go over keywords like idea development and storyboard.
we were task to create a power point presentation about concept, what it is? what it requires and how it influence movie and games.also go over keywords like idea development and storyboard.


concept art by Min Gyu Lee - battle

The colour used is mainly dark colour to set the tone of an attack by a hug monster attack the modern day and any light it little but enough to light up the scene.The focal point for this concept art is the giant creature because of it large size plus the brightness from the explosion catches your attention. The image depict a battle between solider and an attack monster with what appears to be it minions.the atmosphere seems very dime with little light coming from the out the cloud and weapons, which what seen most of time in movie featuring a giant monster attack a city.the meaning for me is that we are never really safe.
My colleges gave there through on what they think the focal point and the atmosphere. My collage said it has very dark colour , with the focal points being the monster and the image depicting battle and chaos with these i agree with. But some of my colleges say it depict wars, i disagree with that because war is conflict between different groups this seems more of a attack then then war.

The artist used the rule of third as a location because he has place the creature in two of the grids cross plus he used the square to determine how they should be for example the bottom square are close and the top are far.
I would say the action is in the middle square because of that where the creature face is located as well as the focal point.
The biggest form in the image is creature which is located on the cross on the right.
Rule of third
These are five rough sketch i did of an environment using the rule of thirds grid
The rule of third is what artist used to map out where certain objects will be located and where the action is. they will all way be on cross or the lines
Using the rule of third I created 5 quick rough sketch on Photoshop , we were free to create out own as long as they followed the rule of thirds
This first sketch is of an light on the coast i place the light house in one of the cross and had the coast follow the line.plus I used a large brush to create circle which will be the moon.

This one is of city I sketch building elevator that not only is in the cross but follows the line that on the right.This sketch also include a rive occupied by boast and the other cross meets the building across the river.

This sketch my not be centred on the one of the cross but it is in the line. and the main focal for this is the sword on the cliff and the background is to represent clouds.

The centre for this is the comet and fire on the cliff and they both line up together with grey colouring representing the ocean.

My final one sketch is of river of lava I used the rule of third to show were it will end and other cross is for the spike rock edges with the grey being smoke.The lave also follows the rule of third because it remain with in the top, middle and bottom central squares.

Golden Spiral
The spiral circle is used to map out environment in concept art by following the circle line that come off the focal point
For this task we chosen concept art off the internet and determent if it follows the rule of third or the golden spiral


I also believe this to be a grid because the main point and focal is winged horse and it is contracted

environment sketches
We were task of creating a sketching in Photoshop of an forest , dessert and coast environment using the golden spiral.these work were similar to the sketch from the rule of third but this seems more easier we could follow the spiral line.
all my environment sketches follow the spiral line that come off the focal point.
Coast environment

Dessert environment

forest environment

visual weight
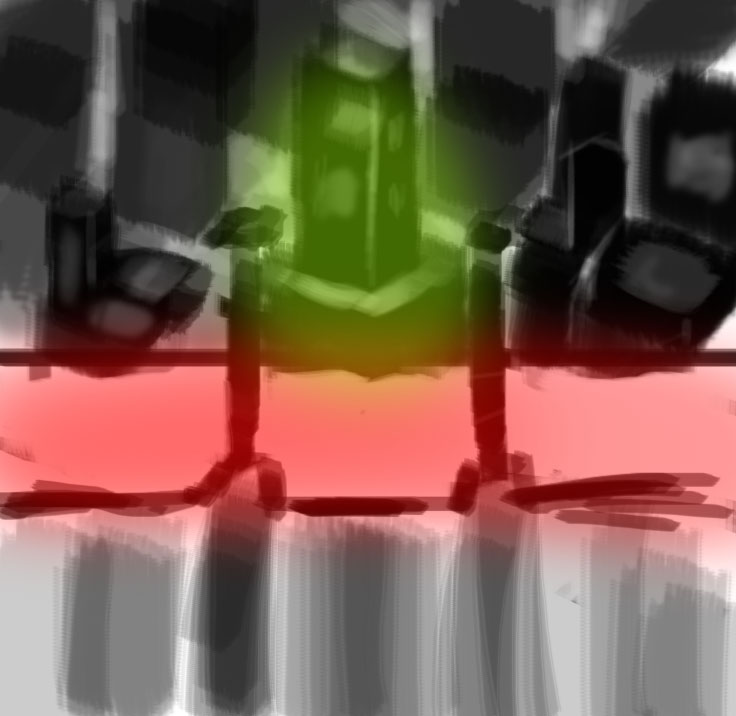
For this we were task to find 2 environment concept art and colour in red the dominate form which is the larges and most contracted and colour in yellow the sub dominate.
Dominate form are the most larger and most contracted object or person in a concept art.The sub dominate form is the second most largest and or contracted.

I believe the dominate form is the character and building because they are the biggest and sub dominate half built ship. and i believe the man painted green is the focal point because he is most contracted and leading line lead to him.
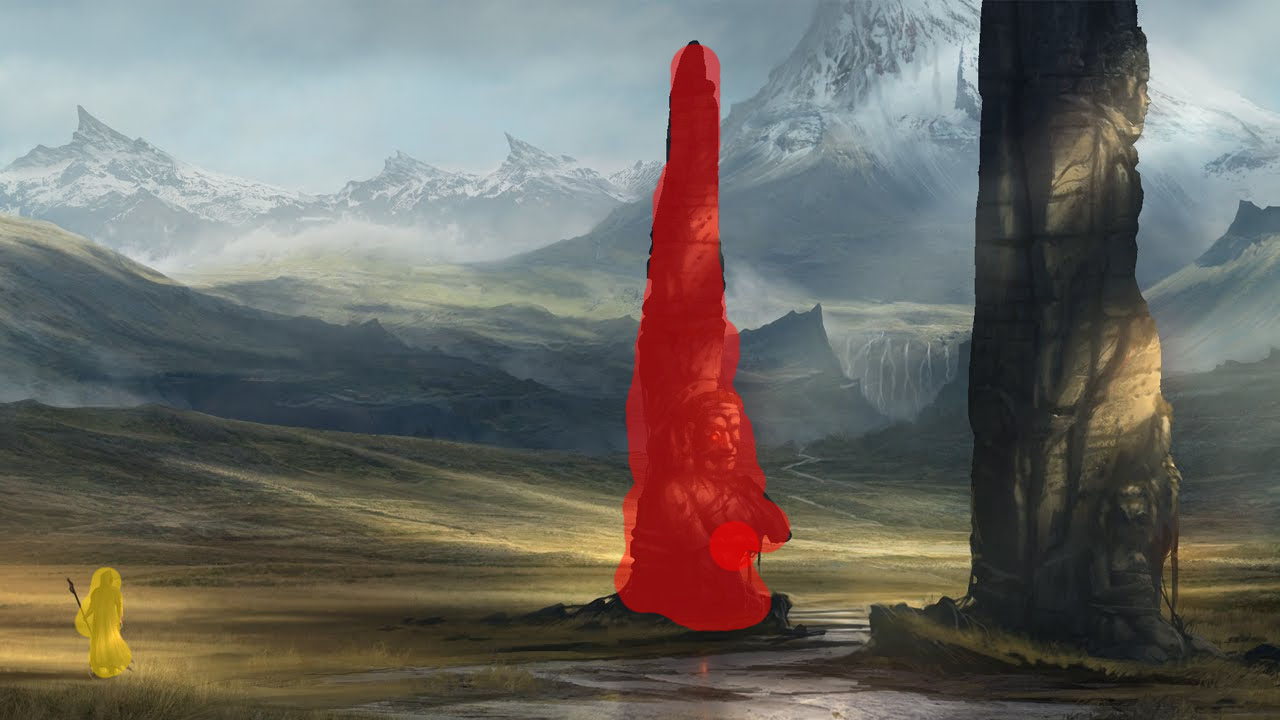
For this i believe the dominate form was the pillar because of it size and light that contracts and sub is the man
environment sketch work
The task was to quick sketch industrial environments in photoshop
I chose to do a oil ring in the ocean and using the golden spiral I made focal point the small fire that appears out of a tower and following that I followed the line to create a small one in the distance.
I also used the rule of three so it focus on the fire as well as getting and idea to place objects such as as boat to place in the ocean.I decided to make the fire the focal point it will be the most contracted then with the golden spiral I had the location for another smaller oil rig.

Leading lines
For this I was task to show leading line of an concept art leading line are lines in concept art such as pathway or other object that direct us to the focal point.
All leading line have bee highlighted in red all of this was done in Photoshop.
This work same as finding the dominate form in visual weight.
In this concept the focal point was the doorway because it the dominate form and you can see the pathway and stair line leading to the doorway those are the focal point.

The focal point for this is the end of the room mainly because of the bright light and their are edges that lead to it as well part of the environment.

This one has many leading line which all come from metal edge towards the light in the middle which is the focal point.

The focal point for this is the large statue with the leading line come from the building structure.

The leading line for this come off the edges of the mountain and the edge of the planets towards the bright light.

Today I put all the sketch I did the last few week into one page and my collages voted on which one I should further develop.

This one had the most voted my forest environment which is one I had planned on further developing

this one is my coast which was the I had in mind

I have chosen the forest because i was most requested by my colleges and seems the most interested from the rest of my sketch.
With the chosen made i highlighted the dominate form in green , all leading line are blue arrows, the focal point is a red dote and finally the yellow is what will used to show beams of light.

This is my reference image for my environment concept art with the cliff and the small waterfall.
http://wallpaperswide.com/japanese_waterfall_painting-wallpapers.html
Concept environment art
This art work is of my forest environment art using Photoshop i painted to add more development towards it.In Photoshop i used technique such as blending as can be seen in the yellow and the green I also used the leaf brush and dark the colour so that it appears as a forest.If I had more time I would have continue on developing the mountains and then included the light source.

perspective and horizontal lines
Today we look at horizon line and perspective, horizon line are the high you see , so they control the perspective and give a reference point.Perspective is a technique used to show depth of a 3D object on a flat surface.
We were also task to create 3 thumbnail sketches using one point perspective.
One point perspective have one vanishing point this point is were all the line meet , this can also be know as a focal point and each line can know as leading lines.


2 point perspective
With these sketch i used 2 point perspective which is using the horizon line but two point as if you are looking at something from a corner.but instead you do not need to place the points on the horizon lines they can be place ether bellow or above.but for this you need to place a straight line in the middle that is were the corner will be.then with each point create orientation lines towards the middle line then used that to create the depth needed.


3 point perspective
This is 3 point perspective which include the Two point perspective with two vanishing point and also a third one that is more vertical.The third point will the corner with middle line being it, then create the top of the building by doing orientation line toward the two point.the third point can be place ether above or below, the blow will create set it as if you are looking it from above but place the point above will look as if you are look up.

Today lesson will look at perspective point and how using them can show depth in our work. using both Photoshop and tradition pencil and paper we create environment piece using one point, two point and three point.Photoshop was suitable for this because i could create orientation lines on one layer and then do the main shapes on another layer so not to get confuse, plus I could used the technique of holding shift to draw straight lines.The perspective is similar to focal point were most focus is.
environment mind map
Today we were task to create mind map for our environment concept piece, each idea I had I through of what else i could add to it or what would fit until i through about combined urban and another planet to create a colony.

I then did one a mind map for the colony
I decide to do a one on another plants.The planets I decide were a Ice , Lava and ocean planets which I add to them what could be add to these plants.I mind map other things such as the colony city and the condition.
I decided to to use a ocean planet.

This is my final mind map of the ocean planet
With this i final decision was to create a colony located on the water near the cliff of ocean waterfall.With the colour of the ocean being Red.


This is my board board for my final concept environment piece , I found image on Colony cites and anything else I could find on a ocean planet

Silhouette
I created 10 silhouette sketch of the environment piece I plan to do in Photoshop. I used technique like the spiral diagram and rule of thirds technique I have learn't in previous lessons.I also highlighted the dominate in red and sub dominate form in green.


 85
85


2 of my most interesting silhouette
These 2 silhouette are the most I find interesting the first one is of a city located near a water fall and the second one is of 2 domed underwater city.The silhouette will use 2 point perspective because it view shows the corner of the building and will have the horizon line to be in the middle to show the cities location near the water.also to include other feature such as planet or space ship launch to show the colony is on another planet.As for the second silhouette they could use a three point perspective so we are looking at the cite as well as the surface so that you know it is located underwater which as mean the horizon line will located at the bottom.
these are my reference images
https://aretoon.deviantart.com/art/Waterfall-City-Matte-Painting-212769053

http://www.art-spire.com/en/daily-selection/derk-venneman-waterfall-city/

sketch overs
With the two silhouette I find interesting I further developed them I Photoshop.The first one i added more building and taller,also include some pillar at the bottom.I used the 2 point perceptive to get the correct size and kept the course o the water.For the second sketch over i added more detail to dome and include underwater vegetation as well as sea animals.


lighting plan
This show how i plan my lighting the yellow will be over any bright light that will be coming out of widow and reflection.The dark shade will be the shadows

progression


Evaluaction
For this project the brief was to create a 2D environment concept art and I chosen to do a city colony on another planet located on a waterfall.I chose to do city on another planet because I wanted to add something that would stand out that wouldn't be seen on earth, so I red colour water so that I look more unique.
During this project I used technical skills like the 2 point perspective to paint my final peace.2 point perceptive shows the corner of a building or object and accurate measure the dept of the building by following orthogonal lines which connect to the two vanishing point .I chosen to it in 2 point perspective because I wanted centralises my dominate form which is the Building with the two flags.I also used 2 point perspective to show that it is located on waterfall by having the water on right flowing down to a fall so that it show that it on a waterfall, and with left side I wanted to show that the city is blocking the water flow so that so it going around to the other side as well.
I also used technique like silhouette before doing my final piece.When I had finished my mind board I had narrowed my idea to what I want,which was colony on alien planet.I drew 10 silhouette on Photoshop while using skills like the rule of third so that I knew where to place anything I added and include the golden spiral.With theses i could chosen which one I found the most interesting to further develop with sketch overs.I also include a lighting plan to map where light will come from and how far it will go as well include dark shades that cause by the light being blocked. Another technique I used was the high brush opacity on the building because the building are hard and solid so they mainly used one colour were as the window used low opacity to show that the small refection.Which mean my concept art could be used in like an open world role playing game because in most role playing game object are usually highly saturated.
I also used reference images , most of wish were of cities located near a waterfall.My reference image was of a piece by Derk Venneman which is called water fall city,I used his work because it related to my final piece, I was interested in his uses of accent colour and his clean uses of lines which I tried to show in my painting . I also had Mood board of building located near a water fall, certain things that you would fine in the water and things that would be in a colony.
During this project I used material like digital painting on Photoshop to final my final environment piece. Photoshop allowed me to construct silhouette easier then doing it on paper.Photoshop was useful because it allowed me place my 2 point perceptive line in with out the the orthogonal line block any view by allow me to low the opacity so I can see the line without it interfering.I could use Photoshop to plan were each object should go and then do my final peace on a new layer and go back and forward to check that I am following my plan.I also did sketches on paper to practice my point perceptive and other skills like the golden spiral so when it came to my final peace I had the skills to do the perspective on Photoshop.Plus Photoshop had many tools I need like the zoom in which allowed me to add detail which normal would be difficult on paper and I had control over my brush so that I could control the opacity when i came to painting I could include blending.
Once I had completed my final piece I was happy with the result and if I had more time I would have include more work on sky to show it space located on another planet.

Comments
Post a Comment